-
-
Download the VESC Tool from here: https://vesc-project.com/node/17
-
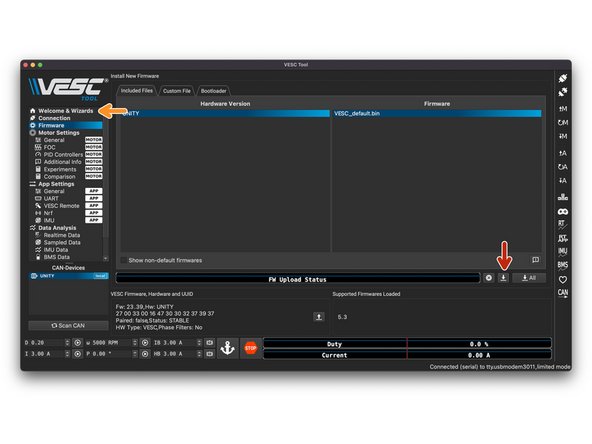
Open the VESC Tool application on your computer
-
Plug the included USB cable into your computer and the Xenith. Turn the Xenith on.
-
Some cheap USB cables do not have data wires inside. Make sure to use the provided cable if you end up not being able to connect to the Xenith in the next step
-
-
-
Click Run Detection (will be located in the same spot as the next button)
-
Before clicking ok on the popup, make sure that the wheels can spin freely. This test will make a loud noise with the motors and then spin them. So make sure the board is upside down and nothing is blocking the wheels from turning
-
Click okay on pop up, wait for the motor detection to finish
-
-
-
Once the motor values populate, click Okay (bottom right corner)
-
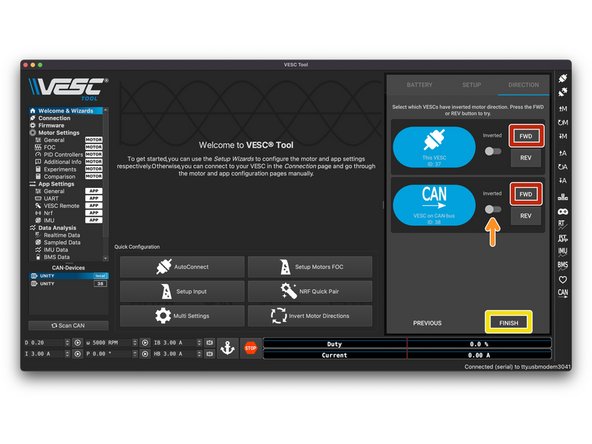
Select forward on both motors to see if they are spinning in the the forward direction. If you place a finger on top of the motor and then select forward, your finger should be pushed towards the truck. If it gets pushed towards the rear of the board, you need to reverse the motor direction
-
If the motor is spinning the wrong way, select the inverted box next to the FWD button on the respective motor. It will likely be the bottom motor.
-
Click finish
-
-
-
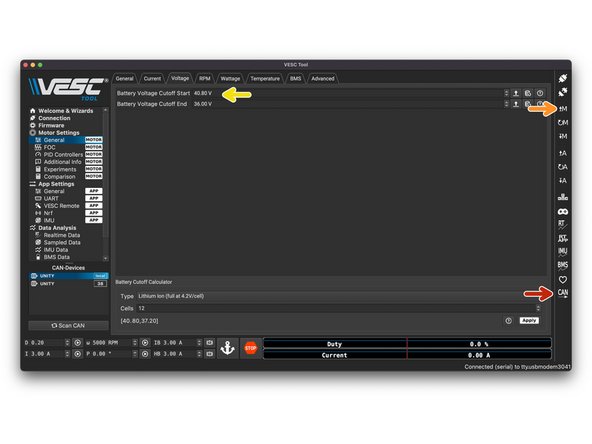
In right column, select CAN. It will stay highlighted when selected
-
You are now communicating with the other side of the ESC (for the second motor), so the values will reset to default.
-
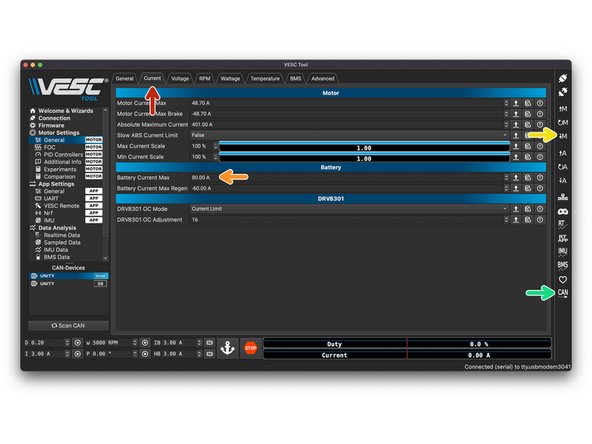
In right column, select up arrow M
-
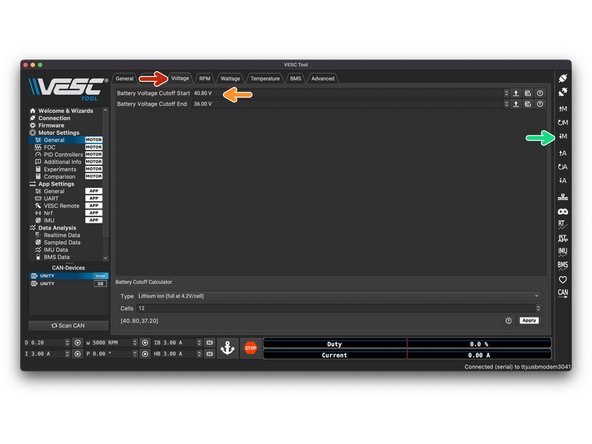
In the Voltage tab, make sure that the values in step 31 are the same
-
Almost done!
Finish Line


